You guys, I have no right whatsoever to be posting a crafty tutorial. I'm laughing at the absurdity of this as I type. I'm also positive that you can find out how to make this exact wreath (or something even prettier) from actual legit sources somewhere on the internet. So I know, completely ridiculous and redundant of me to post this.
BUT! But, this classic little wreath is SO EASY and SO CHEAP to make (once you've invested in your initial materials, every year after that it's pretty much free) that I can't help sharing. I just feel like someone who reads this blog is going to benefit from this knowledge (maybe, I don't know).
So, if you've ever seen fresh bough wreaths in stores, you know they can be pretty pricey. And for something that only lasts you one month of the year at most, I'd always considered them a bad investment as far as Christmas decor is concerned. But they smell so nice! And look so much prettier than the fake ones (not knocking the fake ones, I've totally owned fake ones in my time).
Then, three years ago, I went to a church activity where they taught us how to make these fresh wreaths, and I was sort of blown away at how easy it was. You know, the prices they charge for the ones in the store would make you think this is an incredibly complex process, but no. It takes almost no skill whatsoever (trust me, I have none to speak of), it's basically impossible to screw up, and did I mention it's cheap?
It is, in fact, so easy that I've managed to make one (on my own!) every year since then, despite having a colicky newborn, being in school half-way through December, or (in this year's case), being a nearly 8-month-pregnant beached whale. In fact, I knocked this year's model out, from start to finish (meaning, from trying to find where I stashed all the supplies last year to hanging it on my door) in under an hour.
Okay, so are you ready to do this? Let's get started!
The Materials
Let's talk materials. Your first year doing this there will be some start up costs investing in these items.
1. Wire Wreath Frame
2. Green Craft or Floral Wire
3. Garden or Pruning Shears
4. Ribbon or other wreath decorations, whatever you desire.
5. And now, let's talk about the little secret tip that is honestly so huge it's the reason I'm posting this tutorial instead of directing you to someone more qualified than me: how to get your pine boughs for free!!!
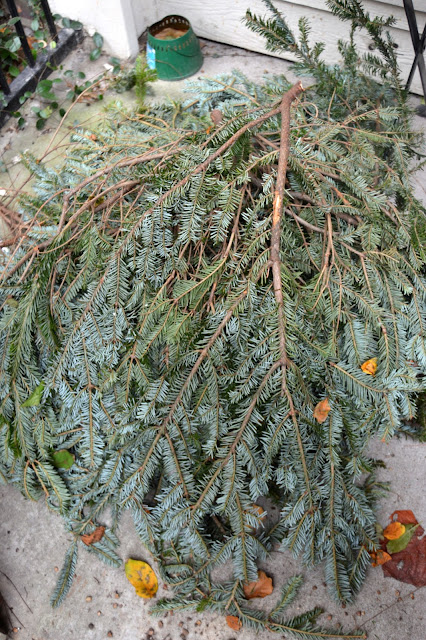
Did you know that you can get free pine boughs from any Home Depot or Lowe's or basically any place that sells fresh Christmas trees? So here's how it works. When a customer buys a Christmas tree from these places, they trim the bottom branches off and throw them away in the dumpster. So, if you are not opposed to a little dumpster diving, you can get carloads of free, fresh pine boughs (I know this from experience). If you are sheepish about dumpster diving, you can alternatively just ask the employees on duty if you can take the scraps from the next tree they trim, and chances are, they will be happy to load you up. That pile pictured up there is what my husband brought home when I instructed him to grab a couple extra boughs after picking up our tree this year. I could probably make fifty wreaths out of that pile of boughs (you only need a handful), but my husband said that the tree guys just kept bringing him armloads to take off their hands. They have no problem giving this stuff away. You guys, this is the coolest tip ever, and seriously makes me so happy every Christmas season, because buying fresh boughs from stores can get expensive fast. Don't make that mistake again, when free boughs are just a dumpster (or kind tree-trimming employee) away!
*Just a note. It's helpful to go on a busy tree-buying day, like the Saturday right after Thanksgiving, because they will be overflowing with extra boughs pretty much all day long. If you go later in the season, things slow down a bit and they may not have extra boughs lying around.
The Method
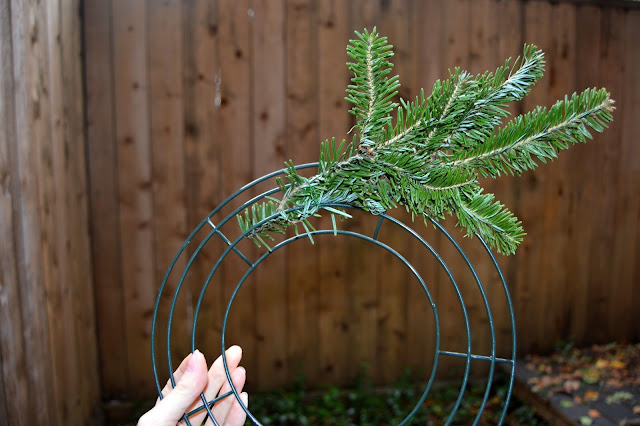
It feels a bit ridiculous to do a step by step of this. Basically, you use the shears to cut smaller pieces off the boughs, weave those pieces through your wreath frame, and secure by wrapping the wire around. Here's a bunch of pictures of the process for those of you who like visuals.
Here's my first branch or two wrapped onto the frame. Just a note that I do recommend doing this project outside (which works out nicely, here in sunny Houston where our Decembers are nice and mild) because of the pine needles and sap that can everywhere. However, if your weather is uncooperative, just spread some plastic or paper down on a table and do it inside. Totally worth it.
And here's about a quarter of the wreath frame filled in. I always debate every year weather my branches should be pointing left or right. I don't think there's one correct direction, but I don't know, real designer people might have opinions. Just go with whatever you feel like, it's your wreath. This year I have the branches leaning to the right (over the top, when I get to the bottom they'll obviously be leaning to the left), which means I was working around the frame counter-clockwise as I added new branches.
Looking good at about 3/4 filled in.
And here it is all the way around. But I'm not done yet! You can probably still see the frame lines and a bunch of the wire wrapping around everything (if you look closely). I like to fill my outside outline around all the way first, and then I go back through and stick more branches in to fill out the wreath and hide the frame and wire. Make it nice and bushy.
But the thing is, there's really no wrong way to do this. You can make your wreath a little thinner and sparser, you can make it super full, you can trim the branches down so the wreath diameter is very small, or you can stick them out as long and trailing as you want. Sky's the limit. You literally cannot mess this up (unless you are some sort of perfectionist with a very precise vision in mind, but just let that go now).
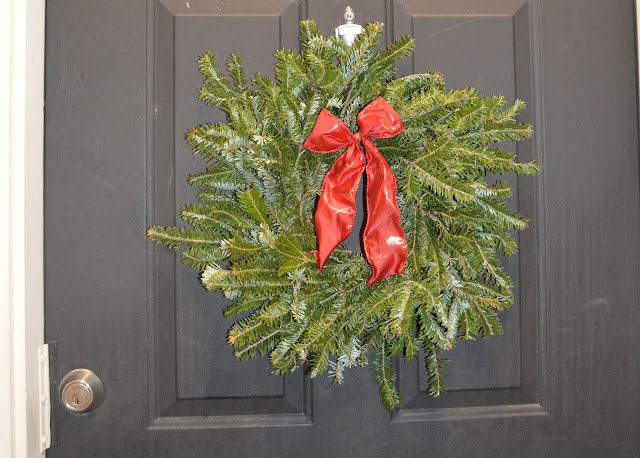
Tie a bow on it (you can attach it with the wire), hang it on your door (or wherever you want) and viola! Freshness and festiveness and awesomeness. My little ribbon is getting kind of sad after three years of use. Maybe next year I'll upgrade to something fancier, stick in a few pine cones or something. Or maybe not.
At the end of December, just use your shears to cut through the wire, dump your needles in a compost pile somewhere, and save your frame for next year (when your wreathe will cost approximately $0!)
And that's it. I hope it all made sense and I communicated clearly just how easy and attainable this project is (leave any questions in the comments). Seriously, I will never go any other way with Christmas wreaths now. I can't imagine storing a fake one when making a fresh one is so easy, so cheap, smells so good, and looks so amazing.
Okay, enough for now, but I'll be back next week with even MORE exciting updates on my Christmas decor (after Halloween and Thanksgiving, you had to know this was coming, right? I'm on a roll).


I'm so proud of you for continuing this! I see my wreath frame every year and just don't get around to it. I still love the image of you in the church classroom full of pine branches! 🌲
ReplyDelete